
At handoff, you should receive full ownership plus the ability to operate and recover your site: all credentials, domain verification in Google Search Console, a connected GA4 property, tested backups covering both database and files, a documented update policy, short Site Health training, and a complete credential inventory. Anything less leaves you dependent on someone else to run your own website.
TL;DR:
- Own the domain through your registrar, and verify a Search Console Domain property through DNS to include subdomains and both HTTP and HTTPS versions.
- Require an offsite backup containing the database and site files, then review evidence of a successful restore on a staging site.
- Request a live walkthrough lasting 30 minutes, covering Site Health, page editing, and a GA4 test event, plus written credentials, restore instructions, and update guidance.
- During the first 24 to 72 hours after launch, check SSL, redirects, sitemap submission, and robots.txt, then confirm a conversion event fires in GA4 DebugView.
- Before agreeing to maintenance, get written costs, response times, and included tasks, and confirm deployments use staging with a rollback plan.
Table of Contents
- The Developer Handoff Checklist You Should Use
- Who Should Actually Own Your Accounts and Domain
- Security Posture and the Update Policy You Should Expect
- Backups Aren’t Real Until Someone Restores One
- Training and Documentation That Make You Self-Sufficient
- What to Check in the First Days After Launch
- Choosing Maintenance or Support After Handoff
- How a Staging to Production Deployment Should Work
- Performance Checks You Should See Documented
- The SEO Audit Report You Should Walk Away With
- Documentation for Custom Features Built Into Your Site
- Training Sessions Your Team Should Receive
- Every Plugin on Your Site Should Have a Documented Purpose
- Why This Handoff Process Matters to Me
- How We Support You After Handoff
- FAQ
- Sources
The Developer Handoff Checklist You Should Use
A good handoff isn’t a folder of files dropped in your inbox. It’s a verified set of deliverables you can check off one by one.
Accounts and access
- Hosting account, domain registrar, DNS management, and CDN login, all under your name or your company’s name.
- SFTP/SSH credentials, database access, and CMS admin accounts, each documented with its purpose.
- Email accounts tied to the domain, plus any third-party tool logins (forms, booking, payment processors).
Backups
- A backup that includes both the database and the files, stored off-site rather than only on the server.
- Written evidence that someone actually restored the backup to a staging environment and confirmed it worked.
Security and updates
- Automatic security updates enabled for WordPress core.
- File editing disabled in the dashboard and file permissions set correctly.
Analytics and ownership
- A Domain property verified through a DNS TXT record with Google Search Console.
- GA4 connected with at least one working conversion event.
Launch basics
- Active SSL, correct redirects, a submitted sitemap, and a properly configured robots.txt.
- Request the full access list before you sign off on the project.
- Confirm domain ownership through your registrar login, not just a developer’s word.
- Ask for a screenshot or short video of the test restore in action.
- Open Site Health in your own dashboard and review any red flags together.
- Check GA4’s DebugView for a live event before the final invoice is paid.
Pro Tip: Keep every credential in a shared password manager instead of a spreadsheet. It’s easier to rotate access later if someone leaves the project.
Who Should Actually Own Your Accounts and Domain
Ownership questions cause more disputes than almost anything else in a web project, so this is worth nailing down early.
Your domain should sit in a registrar account that belongs to you, not your developer. Log in yourself and confirm your name, business, and billing information are correct. If a developer registered it on your behalf, ask for a transfer or at least documented admin access with you listed as the account holder.
Search Console verification deserves special attention. A Domain property verified through a DNS TXT record covers every version of your site, including subdomains and both http and https, so your search data doesn’t fragment across multiple unverified properties later.
Hosting is more flexible. Some developers manage hosting themselves and that’s fine, as long as it’s written down clearly, including what happens if you want to move hosts later.
- Ask for a one-page document listing every account, its login URL, and who holds the password.
- Request a change log showing when credentials were last updated or rotated.
Pro Tip: If a developer insists on keeping any account under their name permanently, ask why. There’s rarely a good reason you can’t at least be listed as an owner or admin.
Security Posture and the Update Policy You Should Expect
A finished site should arrive with sensible defaults already in place, not a to-do list for you to figure out later.
WordPress hardening guidance recommends enabling automatic security updates for core in most cases, since these patches address vulnerabilities without requiring manual action. File editing in the dashboard should be disabled using the DISALLOW_FILE_EDIT setting, which closes off a common route attackers use once they gain admin access. File permissions matter too: core files, themes, and plugins need permissions tight enough to block unauthorized changes but loose enough for legitimate updates to run.
- Confirm automatic updates are turned on for WordPress core.
- Ask whether file editing is disabled and how you’d request a theme or plugin change.
- Review user roles and remove any Administrator accounts that aren’t actively needed.
- Check for server-level protections like a web application firewall or CDN-based filtering.
One security practice worth adopting directly: hardening documentation points to .htaccess protections and limited file permissions as standard steps in a properly secured WordPress install, which means your handoff checklist should include a quick look at both.
Backups Aren’t Real Until Someone Restores One
A backup file sitting in cloud storage proves nothing on its own. The only way to know it works is to restore it.
- Confirm the backup includes both an exported SQL database file and a separate archive of your site’s files, since a complete backup requires both parts.
- Watch, or ask for evidence of, a test restore performed on a staging site rather than the live one.
- Check that the restored staging site loads correctly and matches the live version.
- Set a retention schedule, such as daily backups kept for 30 days and weekly backups kept longer, stored off the main server.
Pro Tip: Ask for the exported SQL file and the file archive as separate downloads you can keep yourself, not just a vendor’s one-click restore button.
Training and Documentation That Make You Self-Sufficient
Handoff documentation should answer the questions you’ll actually have six months from now, not just the ones that come up on launch day.
- A credential inventory covering every login, organized by what it’s for.
- A short quick-start guide for editing pages, adding images, and publishing posts.
- Notes on which plugins and themes need regular updates and how often.
- Written backup and restore instructions, in plain language.
A short live walkthrough works better than a written manual alone. Thirty minutes spent editing a page together, running Site Health, and triggering a test event in GA4 teaches more than pages of screenshots. Close the session with a clear line between what you’ll handle yourself and what requires a developer, so you’re never guessing where that line sits.
What to Check in the First Days After Launch
The first 24 to 72 hours after launch reveal problems you can’t catch in a staging environment.
- Confirm SSL is active across every page and that old URLs redirect correctly instead of returning errors.
- Check that your sitemap is submitted and robots.txt isn’t blocking pages it shouldn’t.
- Open GA4’s DebugView to confirm at least one conversion event is firing correctly, which tells you analytics are actually capturing activity rather than sitting silently.
- Set up a basic uptime monitor and know where server or application logs live if something breaks.
These checks take under an hour but catch the issues that quietly cost traffic and leads in the first week.
Choosing Maintenance or Support After Handoff
Once the site is live, you’ll need a plan for who handles updates, security, and small changes going forward.
-
Sensible maintenance covers core and plugin updates, regular backups, security scans, and minor content edits.
-
Response times and costs vary by provider, so ask for specifics rather than vague promises before signing anything.
-
Set up an emergency access path, meaning someone you can reach quickly if the site goes down.
-
Confirm whether maintenance is billed monthly or per request.
-
Ask what’s included versus what counts as a separate project.
How a Staging to Production Deployment Should Work
Changes to a live site should never happen directly on the server customers are actively viewing. A staging environment is a private copy of your site where updates get built and tested first.
A clean deployment process looks like this: a developer clones the live site to staging, makes changes there, tests every affected page and form, then pushes those changes to production during a low-traffic window. Database changes get handled carefully, since staging and production often have different content by the time changes are ready to go live.
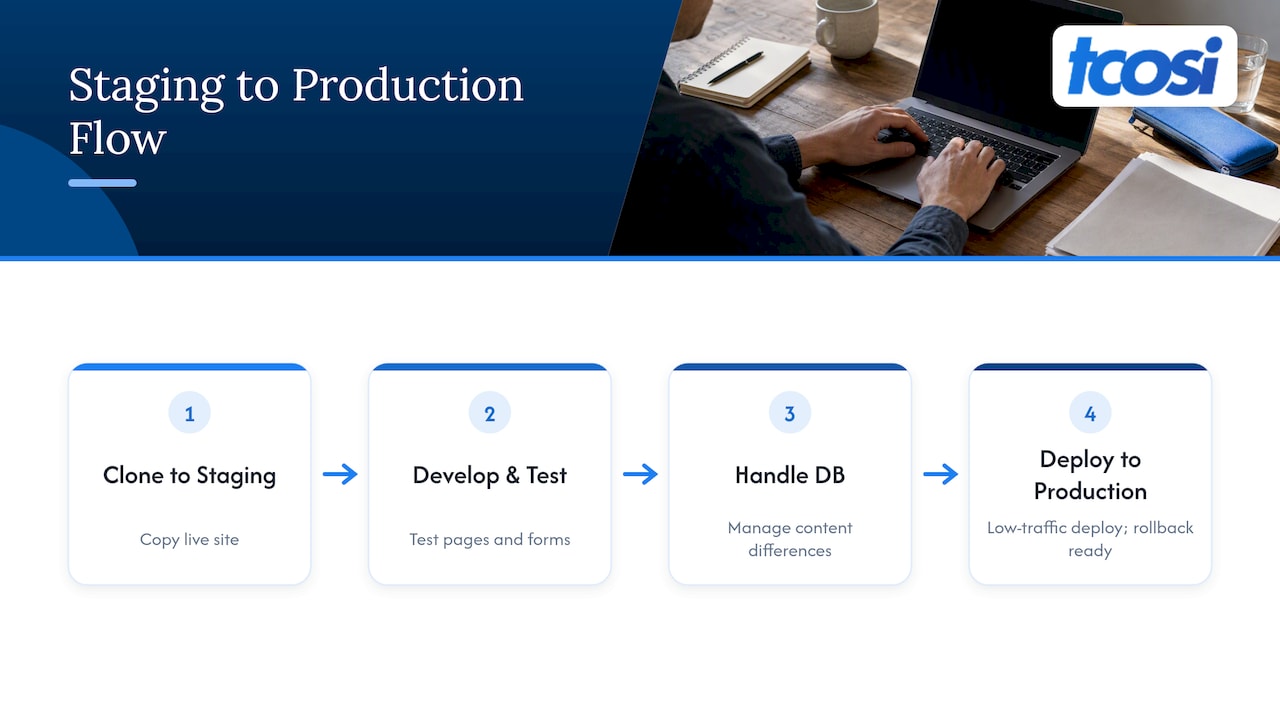
Ask your developer to walk you through how they move work from staging to production, even if you’ll never do it yourself. You should know roughly how long a typical deployment takes, whether there’s a rollback plan if something breaks, and how often staging gets refreshed to match the live site. This matters most once you move into ongoing maintenance, since every future update, whether it’s a new plugin or a redesigned page, should pass through staging before it touches your live site.
Performance Checks You Should See Documented
A fast site at launch can slow down within months if nobody’s watching it. Your handoff should include a baseline performance report, not just a verbal assurance that “it’s fast.”
That report should cover page load times on both desktop and mobile, image optimization status, and whether caching is configured. Ask for the specific numbers measured at handoff, recorded somewhere you can reference later if performance starts to slip.
Documentation should also explain what’s already been done to keep the site fast: image compression settings, caching plugins or server-level caching, and any content delivery network in use. If a CDN is active, you should know which one and how to check its status.
This baseline matters because performance tends to drift as more content, plugins, and images get added over time. Having a documented starting point means you, or whoever manages your site later, can tell whether a slowdown is new or just gradual creep worth addressing during a routine maintenance pass.
The SEO Audit Report You Should Walk Away With
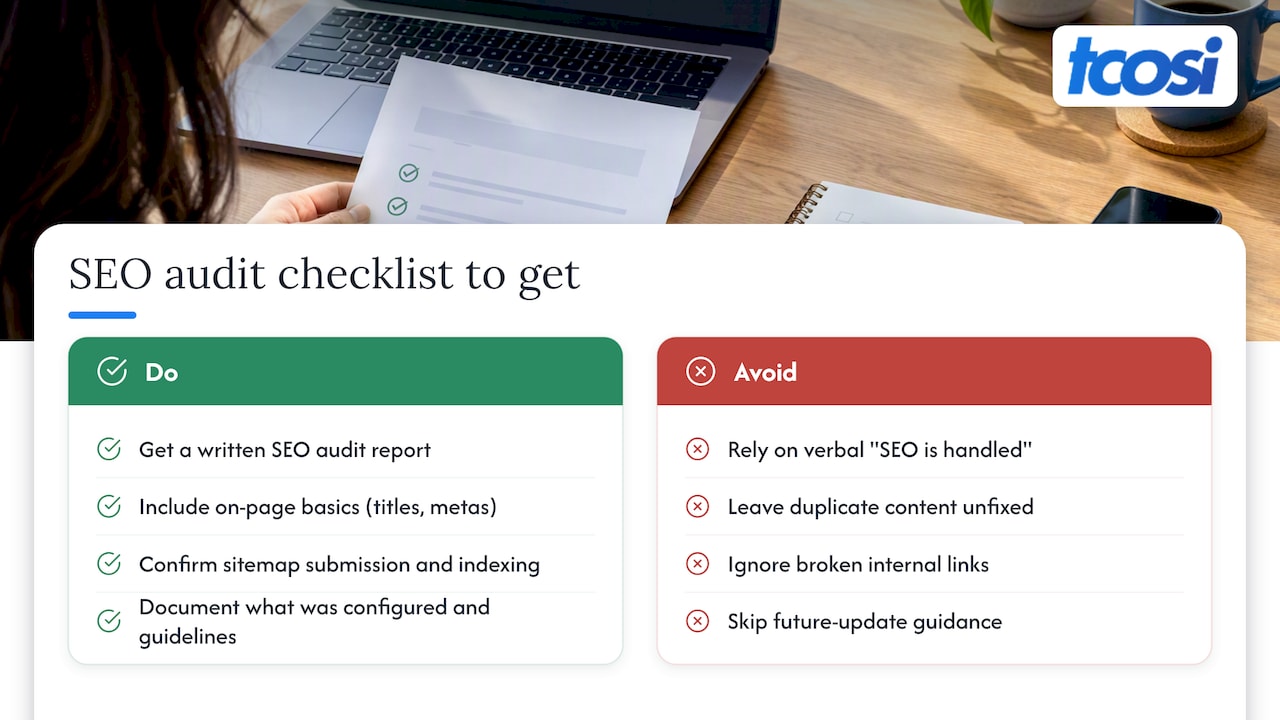
A finished WordPress site should come with a written record of its SEO foundation, not just a verbal “SEO is handled.”
That audit should cover on-page basics: title tags, meta descriptions, header structure, and image alt text across key pages. It should also confirm technical items like sitemap submission and proper indexing, both of which tie directly into the Search Console verification covered earlier in this guide.
Guidelines for future updates matter just as much as the initial report. Ask for a short reference on how to write SEO-friendly titles and descriptions when you add new pages, and what to avoid, like duplicate content or broken internal links. For a deeper look at common pitfalls, our SEO checklist and notes on SEO mistakes worth fixing cover the issues that tend to surface after launch.
If SEO setup was part of your project scope, confirm what was actually configured, whether that’s basic on-page work or more structured technical setup, and get it documented so the next person working on your site isn’t starting from zero.
Documentation for Custom Features Built Into Your Site
Most WordPress sites built for a real business include features beyond standard pages and blog posts: custom post types for things like portfolios, testimonials, or service listings, along with custom fields that store specific pieces of information.
Your handoff documentation should name every custom post type on your site and explain what it’s for in plain language. If your site has a “Case Studies” post type, for example, the documentation should say where to find it in the dashboard, what fields need to be filled in, and how it displays on the front end.
Theme-specific features deserve the same treatment. If your theme includes custom page templates, specific widget areas, or special blocks, those should be listed with a short note on how and where to use them. Without this, you or a future developer will spend time reverse-engineering decisions that took five minutes to document at handoff.
Training Sessions Your Team Should Receive
Documentation helps, but a live training session teaches faster, especially for team members who’ll be making regular content updates.
A useful session covers logging in, navigating the dashboard, editing an existing page, and publishing a new post with an image. If your site uses custom post types or fields, walk through adding one real entry together so it’s not abstract.
Recording the session, even informally, gives your team something to reference later instead of relying on memory. If more than one person will touch the site, consider a short written guide alongside the recording so new hires aren’t dependent on someone else’s notes.
Training works best when it answers a specific question: what can you safely do yourself, and when should you call for help? A clear answer to that question is worth more than a long list of features nobody remembers.
Every Plugin on Your Site Should Have a Documented Purpose
A WordPress site with ten or fifteen active plugins is normal, but you should know what each one does and who’s responsible for keeping it updated.
Ask for a simple list: plugin name, its purpose, whether it’s free or requires a paid license, and how often it typically needs updating. A form plugin and a security plugin have very different update urgency, and that distinction should be clear in the documentation rather than left for you to guess.
This list matters most when something breaks. If a page suddenly looks wrong after an update, knowing which plugins were recently changed cuts troubleshooting time significantly. It also protects you from paying for licenses you don’t need, since an itemized list makes it obvious which plugins are active versus installed and forgotten. For more on how plugin updates should be managed on an ongoing basis, our plugin management guide covers the staging-first approach we use for client sites.
Why This Handoff Process Matters to Me
I built tcosi’s handoff process around one idea: you should never feel locked out of your own website. Every credential, backup, and training session exists so you can operate independently, call for help only when you want to, and trust that what we built together is actually yours. For more on how we work with clients throughout a project, our client feedback workflow walks through the collaboration behind it.
— Tommy Cosimano
How We Support You After Handoff
Handoff is the finish line for a project, but it’s often the starting line for keeping a site healthy. We offer Ongoing Maintenance covering updates, backups, and security monitoring, along with standalone Plugin & Security Management and Content Updates. For current pricing details, please visit our website.

If you’d rather have a dedicated partner than a checklist to manage yourself, check our pricing and we’ll walk you through what fits your site.
FAQ
Who should own the domain after a WordPress project?
You should own the domain outright, registered under your name or your business’s account rather than your developer’s. Confirm this by logging into the registrar yourself and checking the account holder information.
How do I verify my backups actually work?
A backup is only proven reliable once it’s been restored successfully to a staging environment. Ask your developer for evidence of a completed test restore, including the exported database file and file archive, rather than taking the backup schedule on faith.
What’s the difference between a regular GSC property and a Domain property?
A Domain property verified through DNS covers every version of your site, including subdomains and both http and https, in one place. A standard URL-prefix property only covers the exact address it was set up for, which can fragment your search data.
Does tcosi offer ongoing support after a website is finished?
Yes, we offer Ongoing Maintenance, which covers updates, backups, and security monitoring after your site launches. Please see our website for current pricing details.
What should I check immediately after my site goes live?
Confirm SSL is active, redirects work correctly, and your sitemap has been submitted. Then open GA4’s DebugView to confirm at least one conversion event is firing, which tells you analytics are actually working rather than just installed.
Sources
- Set up Google Analytics 4 properties & verify ownership
- Backups — WordPress Developer Resources
- Site Health — WordPress Documentation
- Hardening WordPress — WordPress Developer Handbook


